Permissions directly on process/object
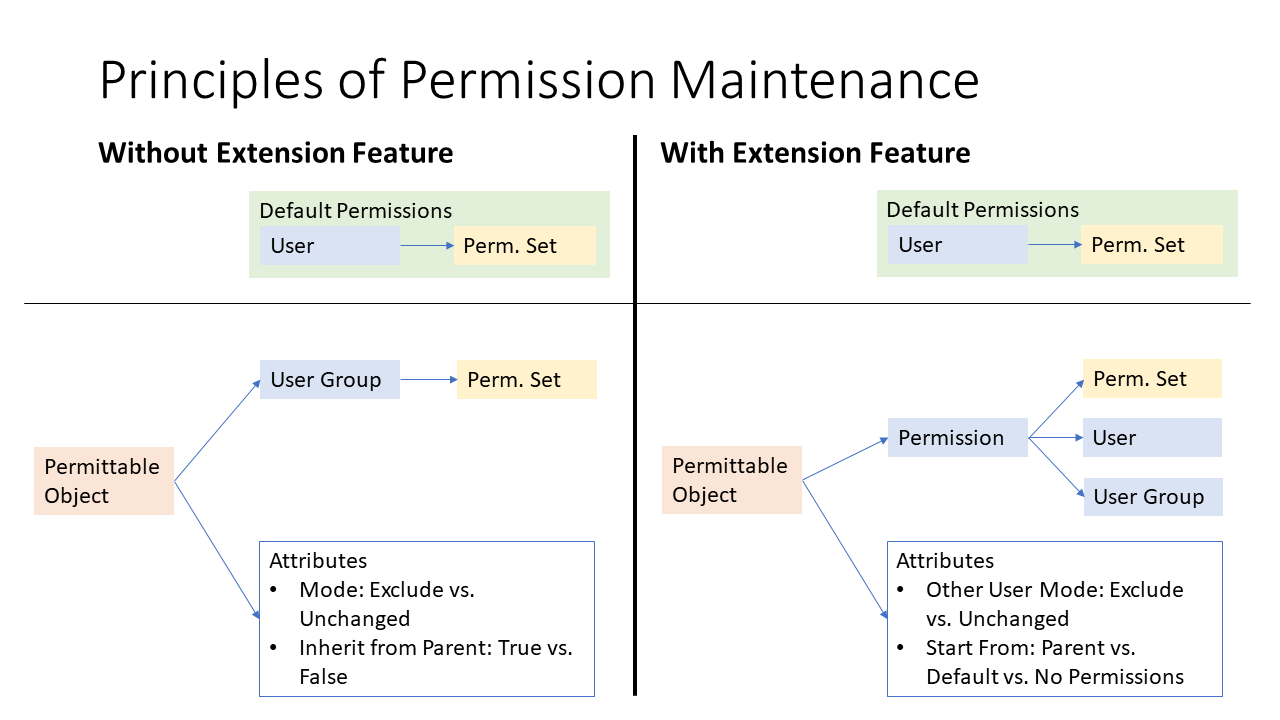
By activating this feature, the permissions assignment is made more flexible and comfortable, as permissions are set directly at the permittable process or object. We point out that this feature Is one way. Once it is activated, it cannot be deactivated again.
The following picture illustrates the comparison of the standard permission maintenance with the activated extension feature:
For the general understanding of Symbio Application roles and Permissions sets, please refer to Permissions - Introduction.
How to maintain permissions with the extension feature
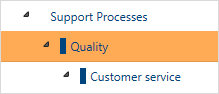
1. Select process or object
Mark process or object for which permissions are to be assigned.
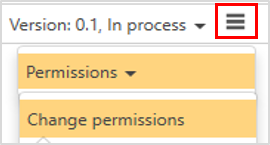
Choose Change permissions in the Toolbar of the Main Content.
2. Define inheritance and effect on other users
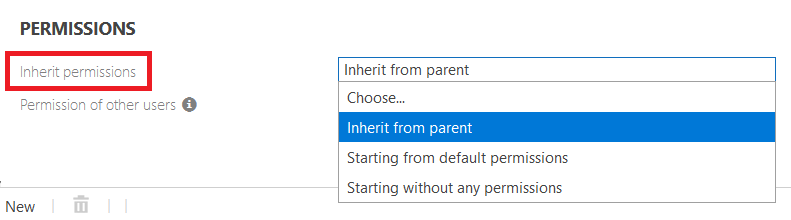
There are three options to define on which basis the permissions are set up:
-
Inherit from parent: Permissions of the selected process or object are automatically adopted from the parent element. Further permissions on this element may be added if required.
Example: A new created Sub Process should inherit the permissions of the higher-level Main Process. Additionally, the permissions of this Sub Process should be differentiated for a new project team (user group) or team member (user).
-
Starting from default permissions: Permissions are set on the basis of existing permission sets assigned to users or user groups before. If no permission sets have been applied, the Symbio standard application roles (e.g. Author, Architect) are used.
Example: The existing permissions (permission sets or application roles) are adopted by default for a new created Sub Process. Additionally, the permissions of this Sub Process should be differentiated for a new project team (user group) or team member (user).
-
Starting without any permissions: Permissions are designed and granted from scratch. The Symbio standard application roles will not be considered.
Example: Any existing permission sets and application roles are not used. The permissions of a new Sub Process are completely redefined; this should be done consistently for all processes and objects.
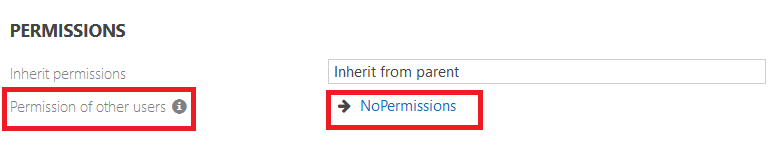
Regarding the effect on other users, there are two possibilities to set inside the attribute "Permission of other users":
-
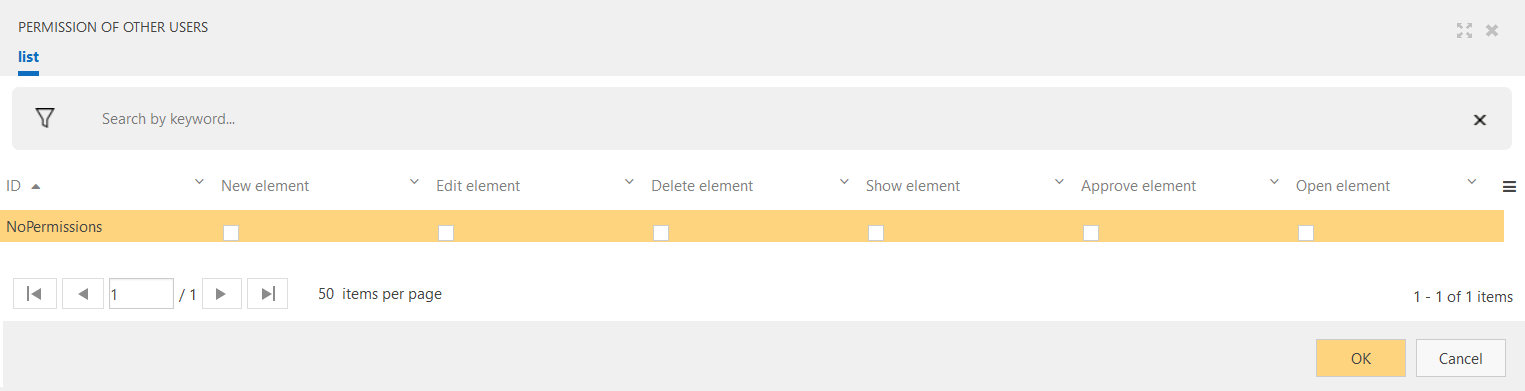
permission set without any permissions: In this case you may select a permission set without any mermissions, see image below; therfore, if the selected process/object is starting without any permissions and you select a permission set without any permissions then other users have no access to the selected process/object.
Example: A new branch in the process structure should only be available for a newly set up project team (user group). The remaining employees of the company should not have access, not even Viewer rights.
-
no permission sets at all: In this case you may select a permission set without any mermissions, see image below; which means, if the process/object inherits from parent or starting from default permissions the granted permission of other users remains unaffected.
Example: The permissions of a new branch in the process structure should be differentiated for specific users or user groups. The existing access rights (e.g. Viewer rights) of the remaining employees remain unchanged.
In other words, based on the "Inherit permissions" selection, the Permission of other users is: * either a limitation of other users permissions if "Inherit from parent" or "Starting from default permissions" is selected, * or an exact prescription of permissions if "Starting without any permissions" is selected.
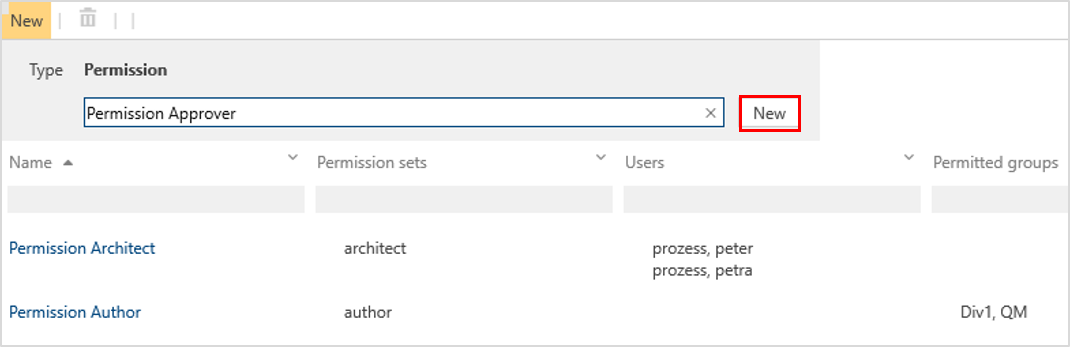
3. Create specific permission types
Click on New to create specific permission types, of course only usable for the selected element. It is recommended to create a specific permission type for each applicable permission set.
In the Detail Content, add corresponding Permission sets, Users and User groups to each permission type.
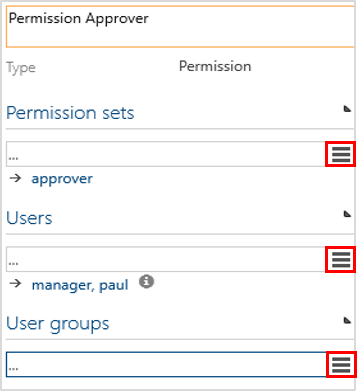
Finally, confirm with OK.
User scenarios
Human resources user
This scenario will show how the access rights of a specific business unit of the company can be specified in detail.
Please proceed as follows:
-
Navigate to User tile and create a new HR user, fill in Application role (e.g. Architect, use the "Change permissions" dialog to set that in newer versions of Symbio); alternatively create a user group for several HR users.
-
Navigate to Permission sets tile and create HR specific permission sets (e.g. "HR Architect", "HR Author" etc.), defining for each set how elements can be edited.
-
Navigate to Process House and set up a new Category or Main Process "HR" (or just select, if existent).
-
Select Change permissions in the Toolbar; choose "Inherit from parent" from dropdown and select a permission set without any permissions (please create if not existing).
-
Create new Permission types, e.g. "Author permissions", and go to Detail Content to assign corresponding HR permission set as well as HR user or user group.
-
After click on OK button, changes are applied; as the Admin is still logged in, he does not have any permission to see HR Category or Main Process.
External user
In this scenario it will be explained how users (or user groups) should have limited access to a specific part of the Process House, e.g. a specific project in which external partners are involved. Permissions of the other users should remain unchanged.
Please proceed as follows:
-
Navigate to User tile and create a new External user, select "Viewer" as Application role (use the "Change permissions" dialog to set that in newer versions of Symbio); alternatively create an External user group.
-
Navigate to Permission sets tile and create an External user-specific permission set, allowing just to open and to show an element.
-
Navigate to Process House and set up a new Category "Project XY" (or just select, if existent).
-
Select Change permissions in the Toolbar; choose "Inherit from parent" from dropdown and do not select any permissions set at all.
-
Create new Permission types, e.g. "External Viewer permissions", and go to Detail Content to assign corresponding External permission set as well as External user or user group.
-
After click on OK button, changes are applied; and because standard permissions remain unchanged, the Admin has full access to Category "Project XY".
-
Create Permalink of Category "Project XY" and send it to External user or user group, who may now open and see Category "Project XY" by click on this link.